

Laundry room organization isn't something most people want to spend a lot of time on. (Unless you're Instagram addicts like us.) After all, it's where the messiest things in the house wind up—how's it supposed to stay clean? Between dirty clothes and spill-prone detergents, it's a challenge to keep this space in check, never mind make it look Insta-worthy.
But we'd argue that a little organization can make your laundry routine—and your life—a lot easier and more pleasant, even if you have a small laundry room.
You don't have to go nuts with a label maker. A little DIY action and carefully chosen storage supplies is all it takes. Give these ideas a try, and you'll have this chore sorted in no time.
1. Rig Up a Rack
Raise your hand if you lay shirts, sweaters, and baby clothes on top of the washing machine and dryer or over the backs of dining room chairs to dry. Yep, we're guilty too. Ideally, laundry shouldn't take over multiple rooms of your house.
You're right that delicate fabrics like these shouldn't go in the dryer, but you don't need a lot of space to create a dedicated air-drying station.
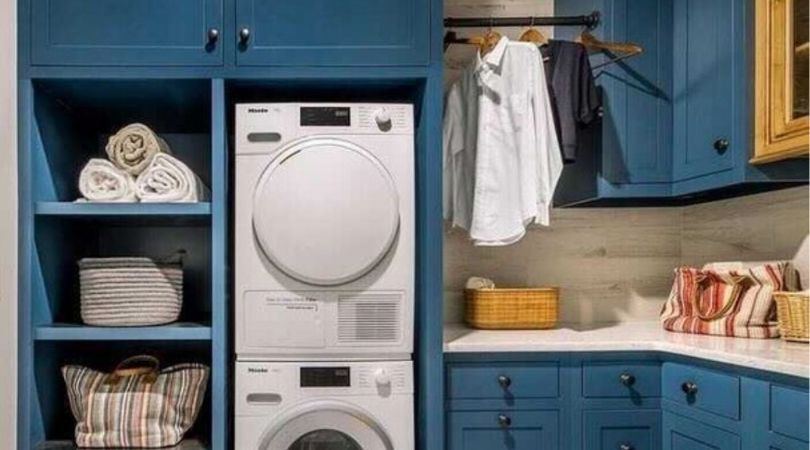
In a small laundry room like the one above, which is outfitted with a Miele washer and dryer, a short curtain rod creates room for clothes to hang above the counter. It lets you hang up button-down shirts the second they come out of the washer. If a permanent rod isn't an option, a tension rod works great too.
The stacked machines here help make room for this; that's one smart way to raise your washer and dryer.
A ceiling- or wall-mounted drying rack, like a Sheila Maid, is another space-savvy way to add air-drying space. They're lightweight and stow out of the way when they're not in use.
In a larger space, a standing drying rack is a great option. We find that wooden ones last longer than plastic ones, and they look nicer too.
2. Strike a Match

Nothing looks sloppier than hangers in different shapes, sizes, materials, and colors on full display. For peak laundry room organization, invest in matching hangers. They'll keep your drying rack neat and uniform.
Pro Tip: Matching hangers don't have to be expensive. We're big fans of Ikea's wooden clothes hangers, which cost about $6 for a pack of eight.
3. Decode Dirty Clothes

Hate sorting the clothes? Set up a system so you never have to do it again. Multiple baskets or hampers that are clearly marked can help make this part of the process automatic. When it's obvious what goes where, nothing should wind up on the floor.
You can color code your hampers or add a label if that's your thing, but it's really not necessary. Having the right number for the types of loads you like to do—say, whites, darks, towels, delicates—should be sufficient.
To streamline your storage even more, choose hampers on wheels. We love rolling them out of the way under a counter or to the side of the room, then up to the washer and dryer to make loading a cinch.
Bonus: You can roll them out of sight when you're not working, so you never see a pile.
4. Decant Your Supplies
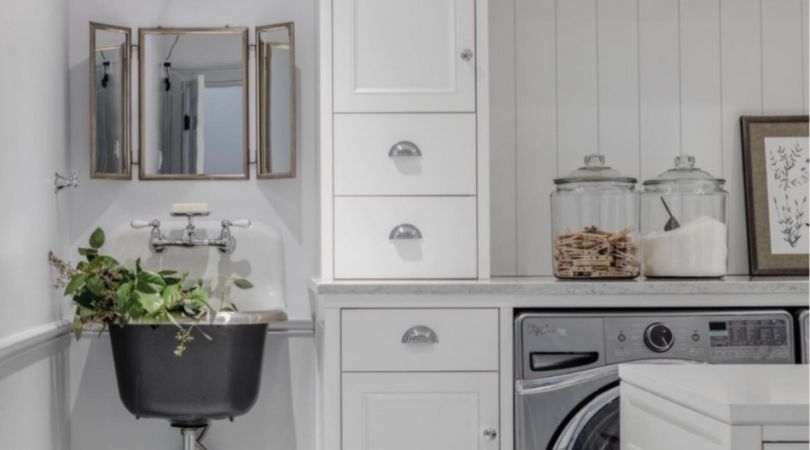
It's humid and harried in most of our laundry rooms. Under those conditions, cardboard boxes won't last for long before they get torn up, and plastic bottles are apt to get sticky spills on the sides.
That's why it's a good idea to store the supplies you use every time you wash in easy-access containers, as shown here on top of this Whirlpool washer and dryer set. Wide-mouth jars, acrylic or canvas bins, baskets, and bowls can streamline your storage and make your countertops nicer to look at.
Once you've poured what you need into your containers, store the rest in nearby a closet or on a shelf that's less prone to temperature fluctuations to make refills just as easy.
6. Prepare to Fold
Is there any chore more annoying than folding laundry? It's not all about our attitude: Lack of space is a major reason why many basketfuls remain next to the sofa a week later.
To help fix the problem, cut out those trips back and forth with the baskets of clean clothes and designate a spot in your laundry room for folding.
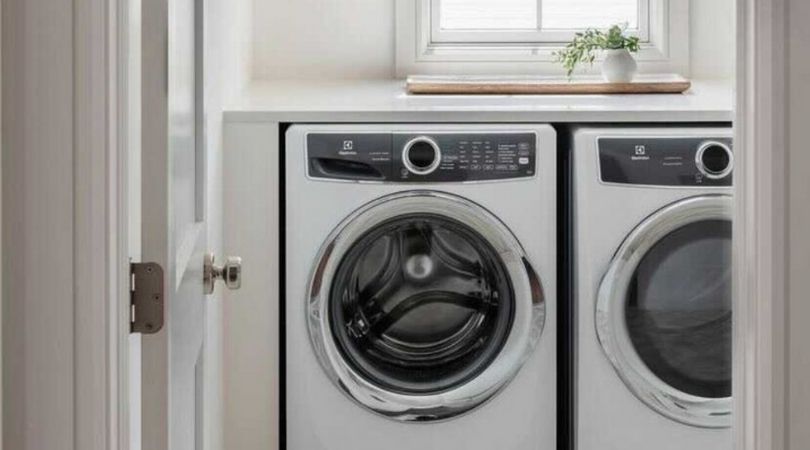
One option: Add a countertop above the washer and dryer, the way MIF Design & Construction did with the Electrolux set shown above. Although this method only works for front-load washers and dryers, it's an easy and inexpensive solution. You can buy a piece of countertop or birch plywood and have it cut to size at your local hardware store, then simply lay it across.
Remodeling? Consider building a countertop and cabinets into your plan.
If you have a top-load or stackable washer and dryer, you can opt to add counter space next to your machines or bring in a table. A folding table works great in a small space; you can put it away as soon as you're finished.
7) Carve Cabinets into Zones

In addition to decanting, designate spots inside your cabinets to hold less frequently used supplies. Or, if you're a clear countertop kind of person, you might prefer having everything behind closed doors.
You'll eliminate clutter, keep better stock of cleaners (which won't be as likely to fall off and get lost behind the machines), and give yourself more space to work.
Another pro: Cabinets also help to keep potentially toxic laundry and cleaning supplies out of the reach of children and pets.
We love the look of laundry rooms with appliances built into the cabinetry, so your machines blend into the decor as well. This Bosch washer and dryer blends right in.